Spooky Silhouettes
Students combine silhouettes they have created with Halloween backgrounds to create spooky scenes.
Task
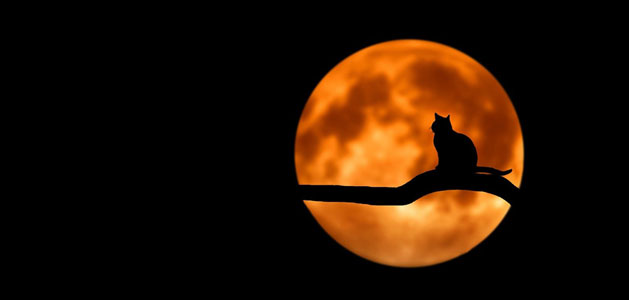
A silhouette is a sharp outline or shadow of an object all in a single color, usually black. In this lesson, you will combine silhouettes with Halloween-themed backgrounds and colors to create a spooky scene.
Engage
Before showing students a silhouette or two, ask them if they are familiar with this term. Have they seen a silhouette before? See if they can connect these to a real life situation like a shadow, a family portrait in this style, or even looking at a friend at dusk.
Share examples of silhouettes with your students. You can find a collection of silhouette art from Augustin Edouart at the UK’s National Gallery.
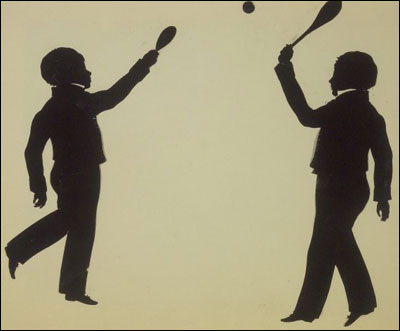
Students might be interested to know that the word silhouette actually comes from the name of an 18th century French finance minister, Étienne de Silhouette. Silhouette would cut out paper shadow portraits of his friends to give as (inexpensive) gifts. The original phrase “à la Silhouette” actually first meant “cheap” or doing something inexpensively.
Before cameras, people had to pay painters to create portraits, both time consuming and expensive. The fact that silhouettes were inexpensive made them become a popular form of portrait.
Before you jump into spooky scenes, ask students to use paper and pencil to draw the outline of a person and fill it in. Depending on the age of your students, you might want to challenge them to use scissors and black construction paper to cut out a silhouette of a student sitting next to them.
Students can also easily create silhouette scenes digitally using a program like Wixie. Simply start a new project and have students use the paintbrush tool to draw an outline of themselves, a classmate, an animal, or other object. Then, have them connect each end of the outline and use the paint bucket tool to fill the shape(s) with black and create a silhouette.
Create
Since darkness and shadows can be scary, let students know they will be using their silhouette skills to create spooky scenes for Halloween.
Use a pencil to draw silhouettes of Halloween objects like bats, cats, and gravestones, on black construction paper and cut them out. Paint Halloween colors across a large piece of paper or even cellophane. Then, arrange the silhouettes on the scene and glue in place.
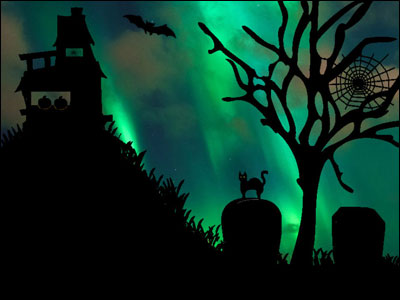
Again, you can use a creativity or paint program with layers to achieve a similar effect. Have students use the paint tools to draw and fill the outlines of scary shapes.
Many art programs have layers so you can add a Halloween-themed image to a layer underneath. In Wixie, students can do this by using the Arrow tool on the tools palette and using the Background Picture button to choose an image that will show behind the painted artwork.
Students can also fill clip art images with black. For example, students can use the Image button and Stickers in Wixie to find a folder filled with Halloween images. When they add these stickers to a page, they simply select them, go the Edit menu and choose Glue to Paint layer before using the paint bucket to fill each sticker with black.
This is a great time to talk to students about a horizon line and ask students to connect their silhouette images with a horizon. Unless, of course, objects like witches are flying through the air.
Share
Display student work around your classroom to get in the Halloween spirit. If student's painted on cellophane, you can hang them on classroom windows for a see-through effect that really shows off the silhouettes.
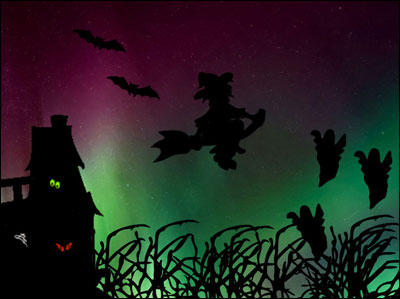
Students may also want to take their images home to decorate where they live. This will also give them a chance to share what they have recently learned about silhouettes with their family and friends.
Assessment
Evaluate prior knowledge as you begin initial discussions about silhouettes.
Student’s spooky scenes provide a performance assessment you can use to evaluate skill in using shape and balance and color to create mood.
Resources
Carol Belanger Grafton. Big Book of Silhouettes. ISBN: 9780486407012.
Smithsonian Magazine - Interview with Silhouette Artist Lauren Muney
Standards
National Core Arts Standards:
Creating
1. Generate and conceptualize artistic ideas and work.
2. Organize and develop artistic ideas and work.
3. Refine and complete artistic work.
Connecting
10. Synthesize and relate knowledge and personal experiences to make art.
ISTE Standards for Students:
6. Creative Communicator
Students communicate clearly and express themselves creatively for a variety of purposes using the platforms, tools, styles, formats and digital media appropriate to their goals. Students:
d. publish or present content that customizes the message and medium for their intended audiences.


