Character Coat of Arms
Students create a coat of arms to represent their personal identity and values or design one to represent the character traits of the protagonist in a book they are reading.
Apps: Wixie®
Task
A coat of arms is a symbolic representation of an individual’s identity and values. As a student of character, your task is to create a new coat of arms that represents your identity! You can also create a coat of arms for a character in a book you are reading or a historic figure you are studying.
Engage
Talk to your class about symbols they find in the world around them. The American flag and eagle on our national seal are symbols most students study in first grade. Ask students if they can remember what the stars (states) and stripes on the flag (colonies) represent.
Ask your class to brainstorm other symbols in your classroom and community and talk about what they mean. Be sure students understand that we use visual symbols to represent ideas and communicate these ideas quickly.
You could also show students the Mitsubishi car symbol. Most of them will know it comes from a car, and many may even be able to tell you it is from a Mitsubishi. They probably don‘t know that Japanese families use a Kamon to represent themselves and that this is the Kamon for the Mitsubishi family.

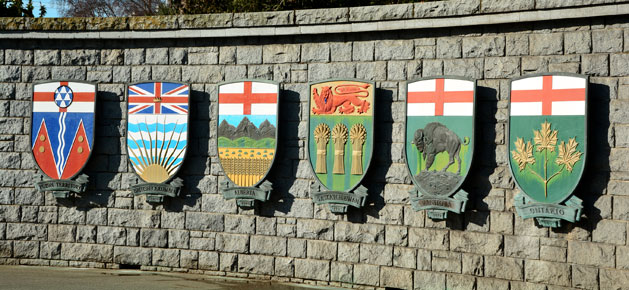
Show students an example of a coat of arms. Medieval knights used a coat of arms to distinguish themselves from their opponents.

While there are many pieces to a coat of arms, and rules for the creation and approval of an official coat of arms, this lesson plan focuses on the colors and symbols used in the shield, the supporters, and the motto.
Have students look again at a coat of arms and discuss what they think the symbols on it might mean. Then, explore additional information about the meaning of common colors, symbols, and supporters used on a coat of arms. Revisit your earlier thoughts on the meaning of the symbols in the example.
Create
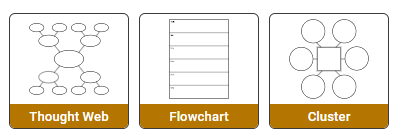
Whether students are creating a coat of arms for a character from a book or for themselves, they should start by identifying key character traits the coat of arms should display. Use a graphic organizer, like a cluster to help students identify and record the traits they want to symbolize on their coat of arms.
Create a Graphic Organizer
Need a thought web, timeline, flowchart, or other graphic organizer for a lesson?
CreateAs they identify words that describe traits and values, have students consider the meaning of different colors and symbols, and choose which ones they will use to symbolize the identity they want to convey.
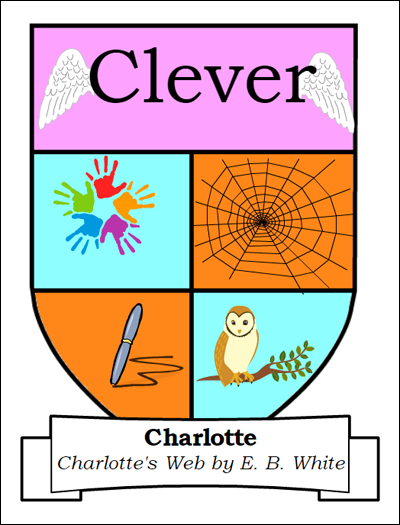
Give students a general outline or suggestion for what their coat of arms should include. You can show students simple shapes or share a template like the Coat of Arms or Family Shield activities in the Wixie Activities library.
If students are creating a coat of arms as an all about me project, you might want to specify what elements they put in each area. For example, ask them to include a symbol to represent their favorite food, hobby or special talent, their family, etc. Having consistent symbols across a class will help students get to know one another.
Telling students what to include removes student agency and thinking in the project. If you do want to boost thinking and student voice, have a class discussion before creating to determine as a class what types of symbols or representations students think should be included or defined for each location on the shield.
If students are creating a coat of arms to represent a character in a book, leave the process more open-ended so the students have to think more deeply about which traits they are sharing the symbolism that goes into them. The motto area is another great way to get students to think about a character’s motivations and values.
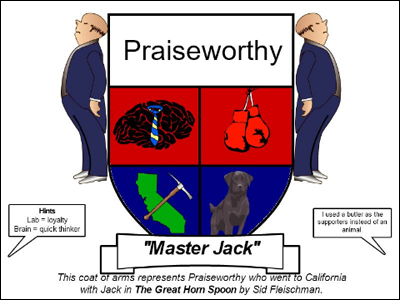
You could also have them add Supporters to their coat of arms. These are the animals that stand to each side of the shield to support it. These are also chosen for symbolic value.
Have students write a paragraph explaining the reasoning behind their use of colors and symbols, as well as why they chose a particular motto for their character. Their writing should describe their thinking during the process, not just be a description of what the image looks like. If student designs are digital, have them record information about the design into their file.
Share
Print each student’s coat of arms and have them present their design to the class. During their presentation, students should explain how their choice of colors, symbols, and motto.
If students have designed a coat of arms for a literary character, print the coat of arms and display in your library or media center to advertise books containing these characters. Include URLs to the project, or create QR codes, so that interested students can hear an explanation.
Assessment
Use the cluster organizers as a formative assessment tool. Have students share their descriptive words and images with you before they begin designing the actual coat of arms so that you can identify comprehension misconceptions and determine if you need provide additional instruction or discussion.
Use the printed shield and/or digital version with the audio recording as a summative assessment. You can use a rubric to help them better understand how you will evaluate the appropriateness and effectiveness of the images, their explanation of their use of color and images, and if appropriate their choice of motto and supporters.
Resources
Hans Bierderman and James Hulbert. Dictionary of Symbolism: Cultural Icons and the Meanings Behind Them. ISBN: 0452011183
Heraldry and the Parts of a Coat of Arms
Standards
Common Core Standards for English Language Arts
CCSS.ELA-LITERACY.RL.2.3
Describe how characters in a story respond to major events and challenges.
CCSS.ELA-LITERACY.RL.3.3
Describe characters in a story (e.g., their traits, motivations, or feelings) and explain how their actions contribute to the sequence of events.
CCSS.ELA-LITERACY.RL.3.4
Describe in depth a character, setting, or event in a story or drama, drawing on specific details in the text (e.g., a character's thoughts, words, or actions).
6. Creative Communicator
Students communicate clearly and express themselves creatively for a variety of purposes using the platforms, tools, styles, formats and digital media appropriate to their goals. Students:
a. choose the appropriate platforms and tools for meeting the desired objectives of their creation or communication.
b. create original works or responsibly repurpose or remix digital resources into new creations.
c. communicate complex ideas clearly and effectively by creating or using a variety of digital objects such as visualizations, models or simulations.
d. publish or present content that customizes the message and medium for their intended audiences.


