A Student's Turn to Flip
Students become the teacher to build understanding and comprehension

Flipping classrooms has been in the educational news for a while now as a way to engage students and maximize the impact of time students spend in classrooms. Teachers start a “flip” by recording their lessons and making the videos available before class. When students return to class, they continue working on advanced or remedial topics based on their own grasp of the topic. The teacher, no longer tied to the front of the class delivering material, is free to move among students to give one-on-one or small group instruction and assistance as needed.
Checking for true understanding is the key to success in any lesson. A student can often pick a correct answer without really understanding WHY the answer is correct. Students operating at this level of understanding are simply parroting back facts and regurgitating information on demand.
Having students create the instructional materials needed to flip a lesson can deepen their own understanding of a given topic as they endeavor to teach the lesson to their classmates. Evaluating the materials they create provides the instructor with a better grasp of students' comprehension, providing the insight needed to tailor instruction.
As I explored the process of implementing a flipped lesson, I realized the countless variations educators use to flip lessons. I saw how some teachers use flipping as a review strategy for test preparation, while others used the flipped delivery to disseminate information as part of a project-based lesson. I explored flipped lessons on an array of topics including how a bill becomes a law, the impact of a foreign element on an environment, and how a writer’s choice of scenery impacts the theme of a story.
As I was learning more about flipped classrooms, I came across an article about the Upside Down Academy, an approach where students become the teacher, especially for the material that they find the most confusing. The Upside Down Academy encourages students to:
- Learn something.
- Pay attention to what you find confusing.
- Come up with a way to make it less confusing / more fun for the next person.
- It can be a blog post, video, dance, song, smoke signal, whatever.
- Create a lesson and make it a little easier for the next person.
It seemed like this process spoke directly to me! I decided it was time for my son to flip his lessons, beginning with the math that I knew he was having trouble understanding. I’d been watching him follow the steps and instructions, but I could see that he didn't truly comprehend the process or why the steps were performed in a specific order.
My child is a visual learner who regularly watches videos to find out more about things he is interested in, so I figured a flipped lesson would really hook him. I hoped that by creating the content and taking on the responsibility of presenting the material to another student, he would develop a deeper understanding of the content. Rather than just learning rote steps, perhaps creating the lesson materials could help him understand the confusing concepts and unlock them for other learners. Because a flipped lesson is used by peers to learn new materials, I figured creating work others would see might also motivate him to work harder than an activity he would simply turn in to his teacher!
Students begin by researching information and resources on the topic. As the students master the material, they decipher the best way to teach their classmates. They select a delivery format suitable for their approach and create a storyboard.
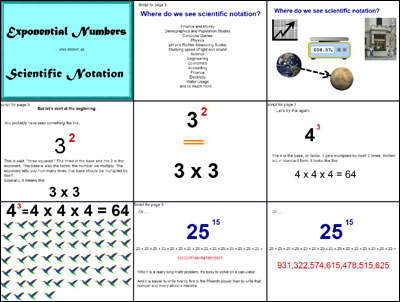
My son explored existing instructional videos about exponential numbers on YouTube and Khan Academy. He quickly realized that he needed images to make the information stick. Watching these videos also helped him understand the underlying need to learn exponential numbers… at first, he didn’t see the point. He decided his video also needed to show how the content relates to real-life experiences.
There are numerous tools and methods for creating flipped instructional materials. Students will need to decide which program gives them the best outcome for their lesson, allows them to use existing technology skills, and fits within the given time frame.
Many people simply capture video of themselves explaining the topic using examples and visual supports. Some prefer to edit the footage and add titles, visual effects, and other embellishment using programs like Adobe Premiere and iMovie. Others use screencasting applications to capture what is happening on a device while recording the presenter's narration to support the process. Still other tools allow students to create narrated slide shows.
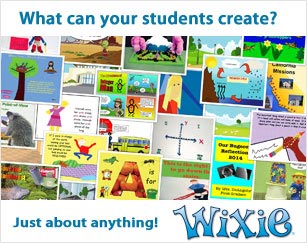
My son decided to use Wixie because it was easier for him to document each step, narrate, and not worry about editing out any fumbling as he shares his knowledge. He also liked the ability to use color-coded text for the different steps, include images, and record his narration. The editing is made minimal because the Wixie project doesn't start as a video, but it ultimately becomes one.
As he worked on his instructional presentation, I could see him really making an effort to reach the other students in his class who were also struggling with exponential numbers. He hasn't presented his lesson yet, but I can already see an understanding in my son that wasn't there before!


