A Digital-Storytelling Approach to Public Service Announcements
How to use the digital storytelling process to provide structure as students design and create public service announcements

After overhearing a conversation with my friend Debbie Bohanan about the public service announcements her high school students were creating, one of my second-grade students asked, “Ms. A, what’s a PSA?” When I explained PSAs to my students, they became highly engaged and immediately wanted to do the same project as the high schoolers.
Student-created public service announcements are a great way to get them to think critically and creatively to solve problems and address issues. Seeing the student’s enthusiasm, we decided to use each other as mentors to implement this powerful process in both of our classrooms.
Here’s how we used the digital storytelling process to give structure to student project work in our classrooms.
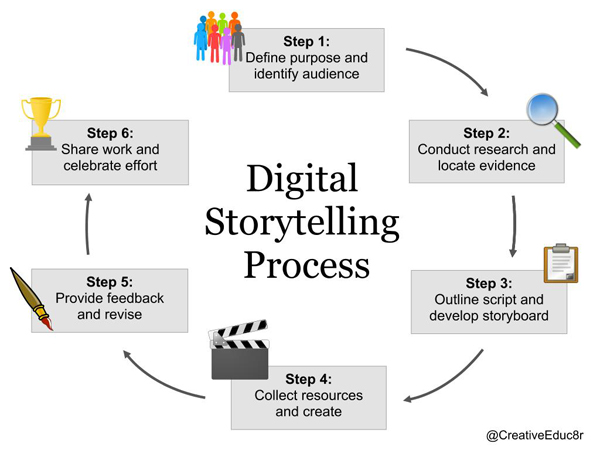
Step 1: Define purpose and identify audience
With both age groups, we started by defining the purpose of a public service announcement. We looked at sample PSAs and discussed intended outcomes like raising awareness and changing behavior.
We figured that if our students were going to inform and persuade effectively, it would help to encourage them to choose an issue that was relevant and relatable and that they could explore in depth.
While the original projects started off with everyday problems like bullying, dress code, and Halloween safety. Over time, the themes evolved to issues such as hurricane preparedness, cell phone use at school, cleaning up the environment, and shopping locally. Gun control was also a hot topic for our students after a local club and school shooting only a few hours away from our Florida classrooms.
Students determined their audience and then worked to create a PSA that targeted that specific group. The high schoolers decided to build video PSAs for their peers, while second graders created trading cards, posters and slideshows to inform other students and raised awareness.
Finding the right voice is crucial to ensure a PSA makes an impact on the chosen audience. The second graders felt that a comic-style poster would appeal to kids their age. Since the focus audience for high school PSAs was other students their age, the secondary students decided they would be hindered if they used adult actors to talk to a teenage audience.
Step 2: Conduct research and find supporting evidence
If the ultimate goal of a PSA is to change behavior, ideas must be backed up by solid evidence. The high-school students focused on hot topics in the media and searched for facts and statistics online to drive home their message and worked with their media specialist to determine if all of their sources were reputable and reliable. Rather than doing online and text-based research, the younger students conducted oral interviews with rparents, teachers, and other adults in the community to gather facts for their PSAs.
Step 3: Outline script and develop storyboard
The next step is to organize your research and ideas so that the PSA has an effective message. Some of our students chose to write the script first and then create the storyboard to outline media needed to support their ideas. Other students began by storyboarding to make sure that their script was in chronological order.
No matter the process, the storyboard helped to ensure that students had a plan and identified necessary resources before it was time to start putting media together.
While young students didn’t need a storyboard for their posters, older students used them as a rough draft for laying out their story. The storyboards were also useful to directors and camera operators to help them make sure that each scene was created or filmed with the original intent of the story.
Step 4: Collect resources and create
Students used the storyboard to identify image content that would support the ideas in their PSAs, making it easier to create the images or find them through an online search. Storyboards and scripts also helped them identify the mood of the PSA and find music that emphasized the emotions they were trying to convey.
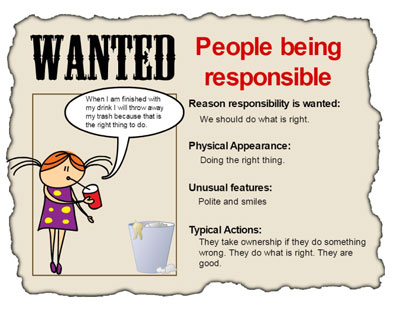
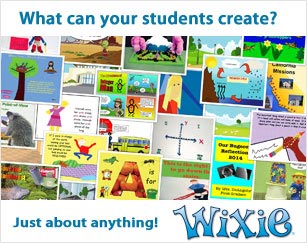
The best way to comply with copyright and fair use is to encourage students to create their own material. Our second graders used the tools in Wixie to create original artwork and poster designs. High school students used their personal cameras to take pictures and capture video which they imported into video tools like Frames, iMovie and Adobe Premiere.
Step 5: Provide feedback and revise
We implemented a revision protocol that required each team to share their projects with another group before turning in their final project. To help ensure that feedback went beyond “That’s awesome” or “Yuck!” students were given prompting questions like:
- Is the message clear?
- Is the correct length to maintain attention?
- Is all media fitting to the message?
Second graders easily spotted spelling mistakes and were able to give effective feedback when their design and layout was too busy. Older students pointed out times when the video started to lag or didn’t make sense.
We created rubrics and checklists to help students think about all the pieces in the storytelling process. Students also used them as prompts to guide their thinking during the revision process.
You may also want to provide students with ideas like “warm and cool” to direct their feedback.
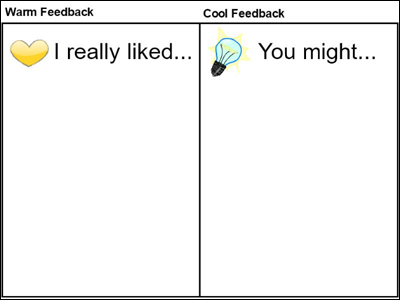
With all of the moving parts of the process and abundance of research and media, students can easily get lost in the details. Rubrics and checklists helped students keep the purpose in mind.
Step 6: Share work and celebrate effort
Students are motivated when they know that their project work is not just for a grade in the gradebook, but something that will be showcased for others to see. We posted students PSAs in the hallway at our school and during morning announcements. You can also share student PSAs at a movie event or ask your local access television station to air them.
Sharing student work beyond their classroom walls made it obvious that their effort and work matters and can truly make a difference in the world.


