Virtual Museum
Students create an online museum, displaying artifacts and their stories to engage others in the heritage of their community.
Task
The International Council of Museums explains that museums serve our society by sharing the “heritage of humanity and its environment for the purposes of education, study and enjoyment.” As you can imagine, it takes a lot of time and money to create, develop, and support a traditional museum. New digital-age tools make it easy to create a user experience that doesn’t exist physically, providing opportunities for community members to learn without having to travel.
Your local community wants you to share the history and influences of how the community was founded and has grown over the years. They don’t have money or space to build a physical museum; instead, they hope that technology can help share this heritage using online exhibits. Your task is to build an online museum to share the stories of the people, historical sites, and artifacts that make the history of your community unique.
Engage
Bring an object from your home that has is both historical and important to your family. For example, grandma’s rolling pin, a quilt made by your aunt, or a few baseball cards from your dad’s collection. Share a story or two about the object or the time period from which it came.
Talk with your students about your decision whether or not to let them touch the object or objects. Can they touch objects in a museum? Why or why not? It is important to see the object in real life, even if they can’t touch it?
To help get your students thinking about how to share stories through artifacts at a digital exhibition, show examples of online museums with your students. Examples might include History Day exhibitions like Out of the Box and Into the Oven and digital extensions of existing brick-and-mortar structures like the Anne Frank House. How do these sites connect the viewer with artifacts and information?
Rather than providing students with a survey of the history of your community and boring them with facts and dates they may not care about, ask students to share what they already know about local celebrities and important historical events. You can prompt them with pictures of people and places if necessary, but you will likely be surprised at what they already know.
Record the people, events, and information students share in this discussion. Don’t organize by timeline; instead, work together to group similar items together. You may want to give students a day or two to add to the list.
You can also task studentes with asking a parent, older family member, or neighbor about the past of your community. Great exhibitions include human stories, and learning to talk to adults will help them be more confident if they need to conduct interviews for their online museum exhibition.
Create
Choose a group of student team leaders. Have them choose an item from the list they want to learn more about. Then let other students form groups of 3-5 around the selected topics. If some topics do not generate sufficient interest or you have leftover students, have them choose another topic with the caveat that they must find at least 3 like-minded team members.
Student teams should begin the research process with a brainstorm about how and where to find information. It may be hard to find books on local, so be prepared to encourage them to move beyond the library and Wikipedia to include local experts and community institutions.
Part of this process is learning how to be a historical detective. Giving them a set list of research resources doesn’t require them to think about how to find information. Have them share their initial ideas with the other teams in the class. Encourage groups to share ideas for resources.
As teams begin collecting factual information, images, and maybe even interviews, they should begin to determine the story they want to tell. Who are the central characters? What is the conflict or problem?
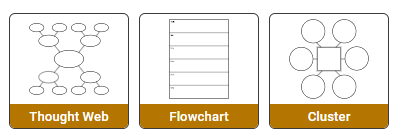
A great museum isn’t just a collection of artifacts. Compelling collections include stories to place the objects in their historical context. As they begin research and developing the story for their exhibition, teams should create a flow chart storyboard that outlines the progression of artifacts and supporting media people will experience in their museum.
As students clarify their flow charts, they should continue to research and collect facts, stories, and media artifacts. They will need to collect media for each part of the exhibition’s story. Media artifacts can include:
- Photographs of artifacts, people, or locations
- Audio recordings of interviews
- Musical performances connected to a time, place, or person
At this point, or possibly even earlier, you will want to talk with students about issues of copyright and permissions. Because they are creating an online museum intended to be a real community resource, student work will not fall under the Fair Use Guidelines for Educational Multimedia.
Rather than relying on copyrighted work, have students take original photographs of physical objects they have found during their research. They should request written permission from the subjects of photos and videos as well as from people who have allowed students to take photographs of their property or possessions.
Local history sites may also have archives that include copyright-free media. The Library of Congress is a great resource for primary source documents, all of which include information about the copyright status of the artifact. When in doubt, assume you do not have permission. Remind students to ask sources for permission and to create as much original content as possible.
Teams should write informational text, narration, and captions for each stop in their online museum. As they work to build their collections, they can organize each stop on the flow chart tour with a single artifact or story.
Students can use online tools like Wixie or Google Sites to create their virtual exhibitions. Since so much work has gone into using storytelling to connect the viewer with the past, teams may want to make their exhibitions self-running.
Share
By definition, the online museum can be shared with the world by distributing its URL. Although these virtual exhibitions exist online, you may want to invite parents and community members to a celebration to showcase the work students have done.
If students use Wixie to develop their virtual museums, have them share the URLs with potential “visitors”.
You may also want to create a web page or classroom blog post with links to each group’s project. You can also use Share to create a home page with links to each student-created exhibition.
If students create virtual museums related to local history, be sure to invite your city council person and members of the historical society. Remember to have a sufficient number of devices on hand so students can act as docents while sharing their online museums.
Assessment
The virtual museum is a great “writing across the curriculum” performance task, where students engage much more deeply with content as they read and write outside of language arts class. This allows you to evaluate students’ content knowledge about a time you are studying in a fun way.
The research process helps them build important literacy skills in Social Studies and Science as they practice finding and evaluating research materials and reading data and primary source materials. Their use of graphic organizers and charts can help you “see” their understanding. Their writing gives them an opportunity to practice sharing scientific and historical information through a combination of informative and narrative writing.
During the process, you will also want to complete formative assessments so you can better determine which supports or additional instruction students need to better comprehend the content they are exploring and the skills they need to complete the project. For example you could do a 3-2-1 style exit ticket after work each day, where individuals share three things they learned, two things they found interesting, and one question they have.
You can also evaluate student groups for teamwork, responsibility, organization, and problem solving during the process.
Resources
Janet Hoskins. Biographical Objects: How Things Tell the Stories of Peoples’ Lives. ISBN: 0415920124
Dawn Raffel. The Secret Life of Objects. ISBN: 193754303X
The Art of Digital Storytelling
Digital Storytelling Across the Curriculum
Smithsonian - Stories from Main Street
We are Teachers - Virtual Museum Tours
Standards
Common Core State Standards for English Language Arts
Literacy in History/Social Studies
Reading Theme
CCSS.ELA-Literacy.RH.6-8.1 Cite specific textual evidence to support analysis of primary and secondary sources.
Writing Theme
CCSS.ELA-Literacy.WHST.6-8.2 Write informative/explanatory texts, including the narration of historical events, scientific procedures/ experiments, or technical processes.
CCSS.ELA-Literacy.WHST.6-8.7 Conduct short research projects to answer a question (including a self-generated question), drawing on several sources and generating additional related, focused questions that allow for multiple avenues of exploration.
ISTE NETS for Students 2016:
3. Knowledge Constructor
Students critically curate a variety of resources using digital tools to construct knowledge, produce creative artifacts and make meaningful learning experiences for themselves and others. Students:
a. plan and employ effective research strategies to locate information and other resources for their intellectual or creative pursuits.
b. evaluate the accuracy, perspective, credibility and relevance of information, media, data or other resources.
c. curate information from digital resources using a variety of tools and methods to create collections of artifacts that demonstrate meaningful connections or conclusions.
d. build knowledge by actively exploring real-world issues and problems, developing ideas and theories and pursuing answers and solutions.
6. Creative Communicator
Students communicate clearly and express themselves creatively for a variety of purposes using the platforms, tools, styles, formats and digital media appropriate to their goals. Students:
a. choose the appropriate platforms and tools for meeting the desired objectives of their creation or communication.
b. create original works or responsibly repurpose or remix digital resources into new creations.
c. communicate complex ideas clearly and effectively by creating or using a variety of digital objects such as visualizations, models or simulations.
d. publish or present content that customizes the message and medium for their intended audiences.